Installing The Rocky Road
Over The Top Steering System
Like
most Samurai owners I like to think I am frugal. Actually I am cheap!
I will cut corners and save my hard earned money every chance I get. A
good example of this is the spring over I did to my tintop. I fabbed
the perches from scraps laying around. I booty fabbed the steering arm
too. I am not proud of that fact, but it does prove just how frugal I
can be. I was willing to put up with an ugly steering arm that
transferred any bump steer up to the steering wheel with an ugly jolt
just to save a few bucks. Recently a deep mudhole, and a bad angle on
the only winch anchor point bent my money saver into an unusable piece
of steel. Time to pony up and install a real steering solution. 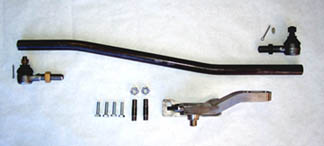
By researching on the Internet and speaking to a couple of vendors I found what I think is the best overall solution for a reasonably priced, solid, stable steering on a lifted Sammi. The Rocky Road OTT Stage 1 Steering System.
http://www.rocky-road.com/ottsteer.html
 There
are two basic kinds of setups for over the top of the knuckle steering
setups. They both move the drag arm above the top of the leaf spring by
using a new bolt on arm that raises the connection point for the drag link
arm. The first option uses the four bolts of the kingpin to hold the new
arm in place and the second uses the same four bolts and the two-caliper
mount bolts for a six-bolt attachment solution. I think that more is better
in this case. The Rocky Road OTT Steering Solution has the six point
attachment arms for strength. It also allows you to easily upgrade to the
Stage II Steering, which includes a second bolt on arm and a new tie rod so
that it also will be above the leaf springs. This two stage install option
appealed to my frugal nature.
There
are two basic kinds of setups for over the top of the knuckle steering
setups. They both move the drag arm above the top of the leaf spring by
using a new bolt on arm that raises the connection point for the drag link
arm. The first option uses the four bolts of the kingpin to hold the new
arm in place and the second uses the same four bolts and the two-caliper
mount bolts for a six-bolt attachment solution. I think that more is better
in this case. The Rocky Road OTT Steering Solution has the six point
attachment arms for strength. It also allows you to easily upgrade to the
Stage II Steering, which includes a second bolt on arm and a new tie rod so
that it also will be above the leaf springs. This two stage install option
appealed to my frugal nature.
With my decision made I called Rocky Road’s toll free
800 number. The sales guy asked me several questi ons about my lift setup, he
wanted to know the total lift, the kind of spring set up I have and my
perch design. These are all good questions and show that Rocky-Road is
aware that a one size fits all solution is not going to work. After
answering all his questions he let me know that it would be 7-10 days for
delivery to Florida for my Stage 1 package. I placed the order and nine
days later there it was, on my front porch. When I opened the package
I found one arm, the drag link, two rod ends, four new king pin bolts and
two studs for the caliper mounts. There was also a detailed page of
installation instructions. All of it impressively beefy compared to
the stock stuff about to be replaced.
ons about my lift setup, he
wanted to know the total lift, the kind of spring set up I have and my
perch design. These are all good questions and show that Rocky-Road is
aware that a one size fits all solution is not going to work. After
answering all his questions he let me know that it would be 7-10 days for
delivery to Florida for my Stage 1 package. I placed the order and nine
days later there it was, on my front porch. When I opened the package
I found one arm, the drag link, two rod ends, four new king pin bolts and
two studs for the caliper mounts. There was also a detailed page of
installation instructions. All of it impressively beefy compared to
the stock stuff about to be replaced.
|
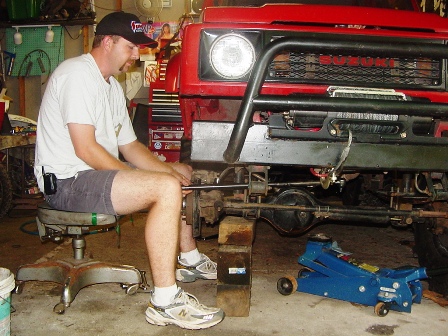
The next step is to remove the old drag link arm. There is one 17mm castle nut to remove on each end of the arm, don’t forget to pull out the cotter pin first. The arm came off easily because of the on-trail repairs I had made recently. It is possible that a pickle fork will be needed for the removal.
|
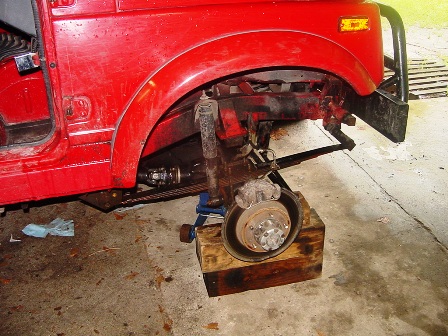
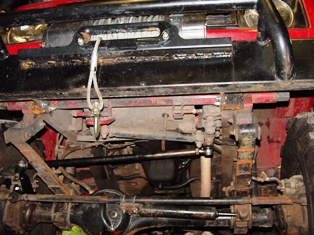
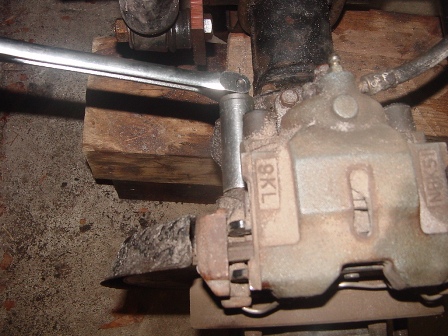 Next
using a 17mm socket remove the brake caliper and rotor from the
axle. You can see in the picture that I propped the caliper on top
of the shock mount so that it was not dangling by the brake hose. Next
using a 17mm socket remove the brake caliper and rotor from the
axle. You can see in the picture that I propped the caliper on top
of the shock mount so that it was not dangling by the brake hose. 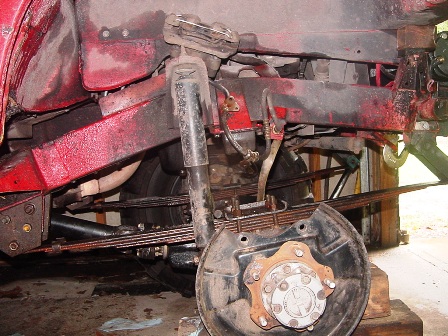 Then take out the four 12mm bolts holding the top king pin in place. Be careful with the shim that was under the kingpin, it is very thin and easy to misplace. With the kingpin removed take advantage of the opportunity to pump a good bit of high quality grease down into the hole.
|
|
|
|
|


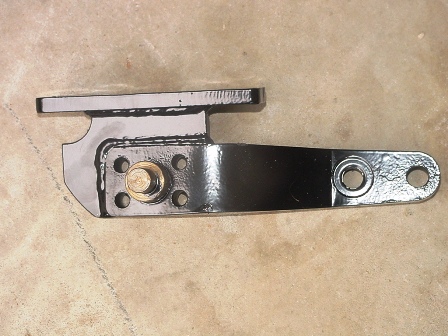
 Now
that the arm is completely mounted it is time to install the drag link.
The first step is to install the ends into the bar. They thread in
easily, I test fit the drag link several times until I had a total
length that allowed the arm to easily line up with the front hole on the
new steering arm and the pitman arm on the steering box.
Now
that the arm is completely mounted it is time to install the drag link.
The first step is to install the ends into the bar. They thread in
easily, I test fit the drag link several times until I had a total
length that allowed the arm to easily line up with the front hole on the
new steering arm and the pitman arm on the steering box. 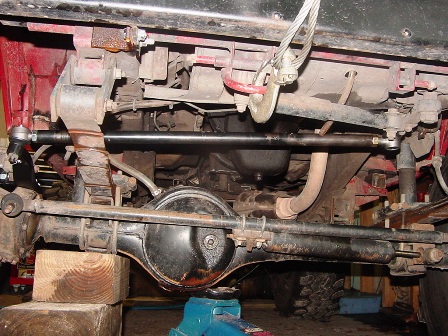
Then it is a simple matter to line the drag link ends up with the holes and tighten the provided castle nuts until the cotter pin can be put through the hole and bent in place. Finally tighten down the lock nuts to hold the spacing on the ends and put the tire back on. It is time for the test ride.
 The
first thing I noticed is how much easier it is to steer with the correct
geometry between the pittman arm and the wheel. Not as easy as power
steering would be but much better that the previous setup. The next
thing is the lack of bumpsteer. I have a section of pine tree roots
that cross my driveway that have always given the steering wheel several
jerks as I crossed them. Not any more, just the feeling of crossing
them, not fighting the wheel across them. After a quick double check to
make sure everything is tight I headed out for the pavement to check the
on-road manners: in a word awesome! It was really good but I still have
more wheel play than I wanted so I put it back up on the jack and had my
buddy turn the wheel while I checked the front end for play. I found
that the ends on tie rod that I did not replace had a good bit of play
in them. I could easily continue to drive it like this but it looks
funny with that single arm under the springs…and it is loose…so it must
be time to order the Stage II upgrade and put the tie rod where it
belongs!
The
first thing I noticed is how much easier it is to steer with the correct
geometry between the pittman arm and the wheel. Not as easy as power
steering would be but much better that the previous setup. The next
thing is the lack of bumpsteer. I have a section of pine tree roots
that cross my driveway that have always given the steering wheel several
jerks as I crossed them. Not any more, just the feeling of crossing
them, not fighting the wheel across them. After a quick double check to
make sure everything is tight I headed out for the pavement to check the
on-road manners: in a word awesome! It was really good but I still have
more wheel play than I wanted so I put it back up on the jack and had my
buddy turn the wheel while I checked the front end for play. I found
that the ends on tie rod that I did not replace had a good bit of play
in them. I could easily continue to drive it like this but it looks
funny with that single arm under the springs…and it is loose…so it must
be time to order the Stage II upgrade and put the tie rod where it
belongs!